Monthly Archives: October 2010

Make A Working Rod Puppet From Office Supplies

Update: If you’d like to see a video on this puppet. Click here!

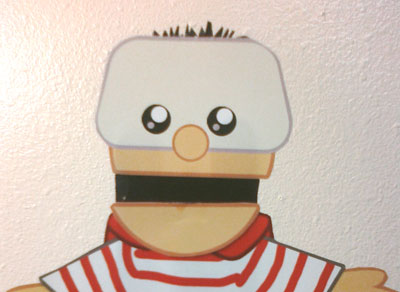
The script for this Sunday’s puppet lesson called for a second puppet character that resembled the first. Since I created the costume for our regular character from scratch, this wasn’t going to be easy or cheap. I started thinking about craft supplies, foam balls for heads, dowel rods for the body, elastic to create tension for the jaw. I even went as far as to look up simple puppet making online. Then I had this idea… why not make myself out of paper?

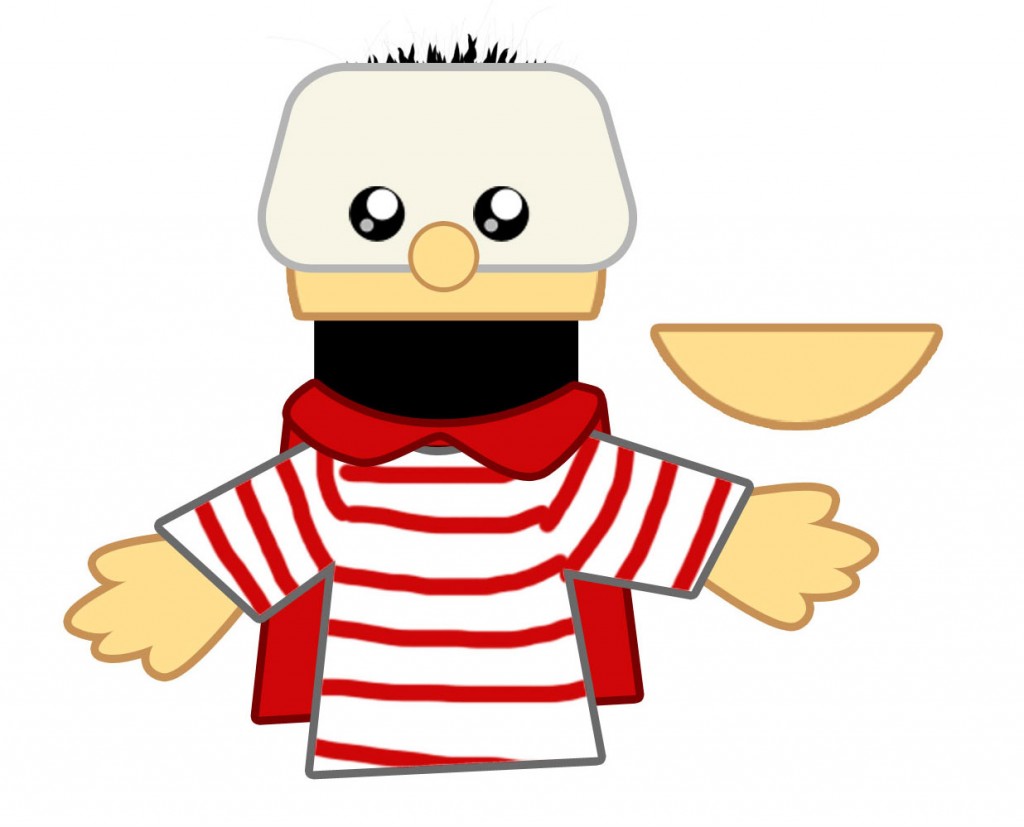
The first step was to draw the character out in Photoshop. (You can download the finished image as a PDF if you’d like to use it yourself) Then I printed it out on card stock with a color printer. You could just as easily draw your character directly on the paper though. Then I cut it out and cut a slit at the bottom of the black space. I slid a narrow strip of paper up through the slit and attached it with Super Glue to the top edge of the characters bottom lip. Instantly I was able to manipulate the mouth… but I had to use both hands.

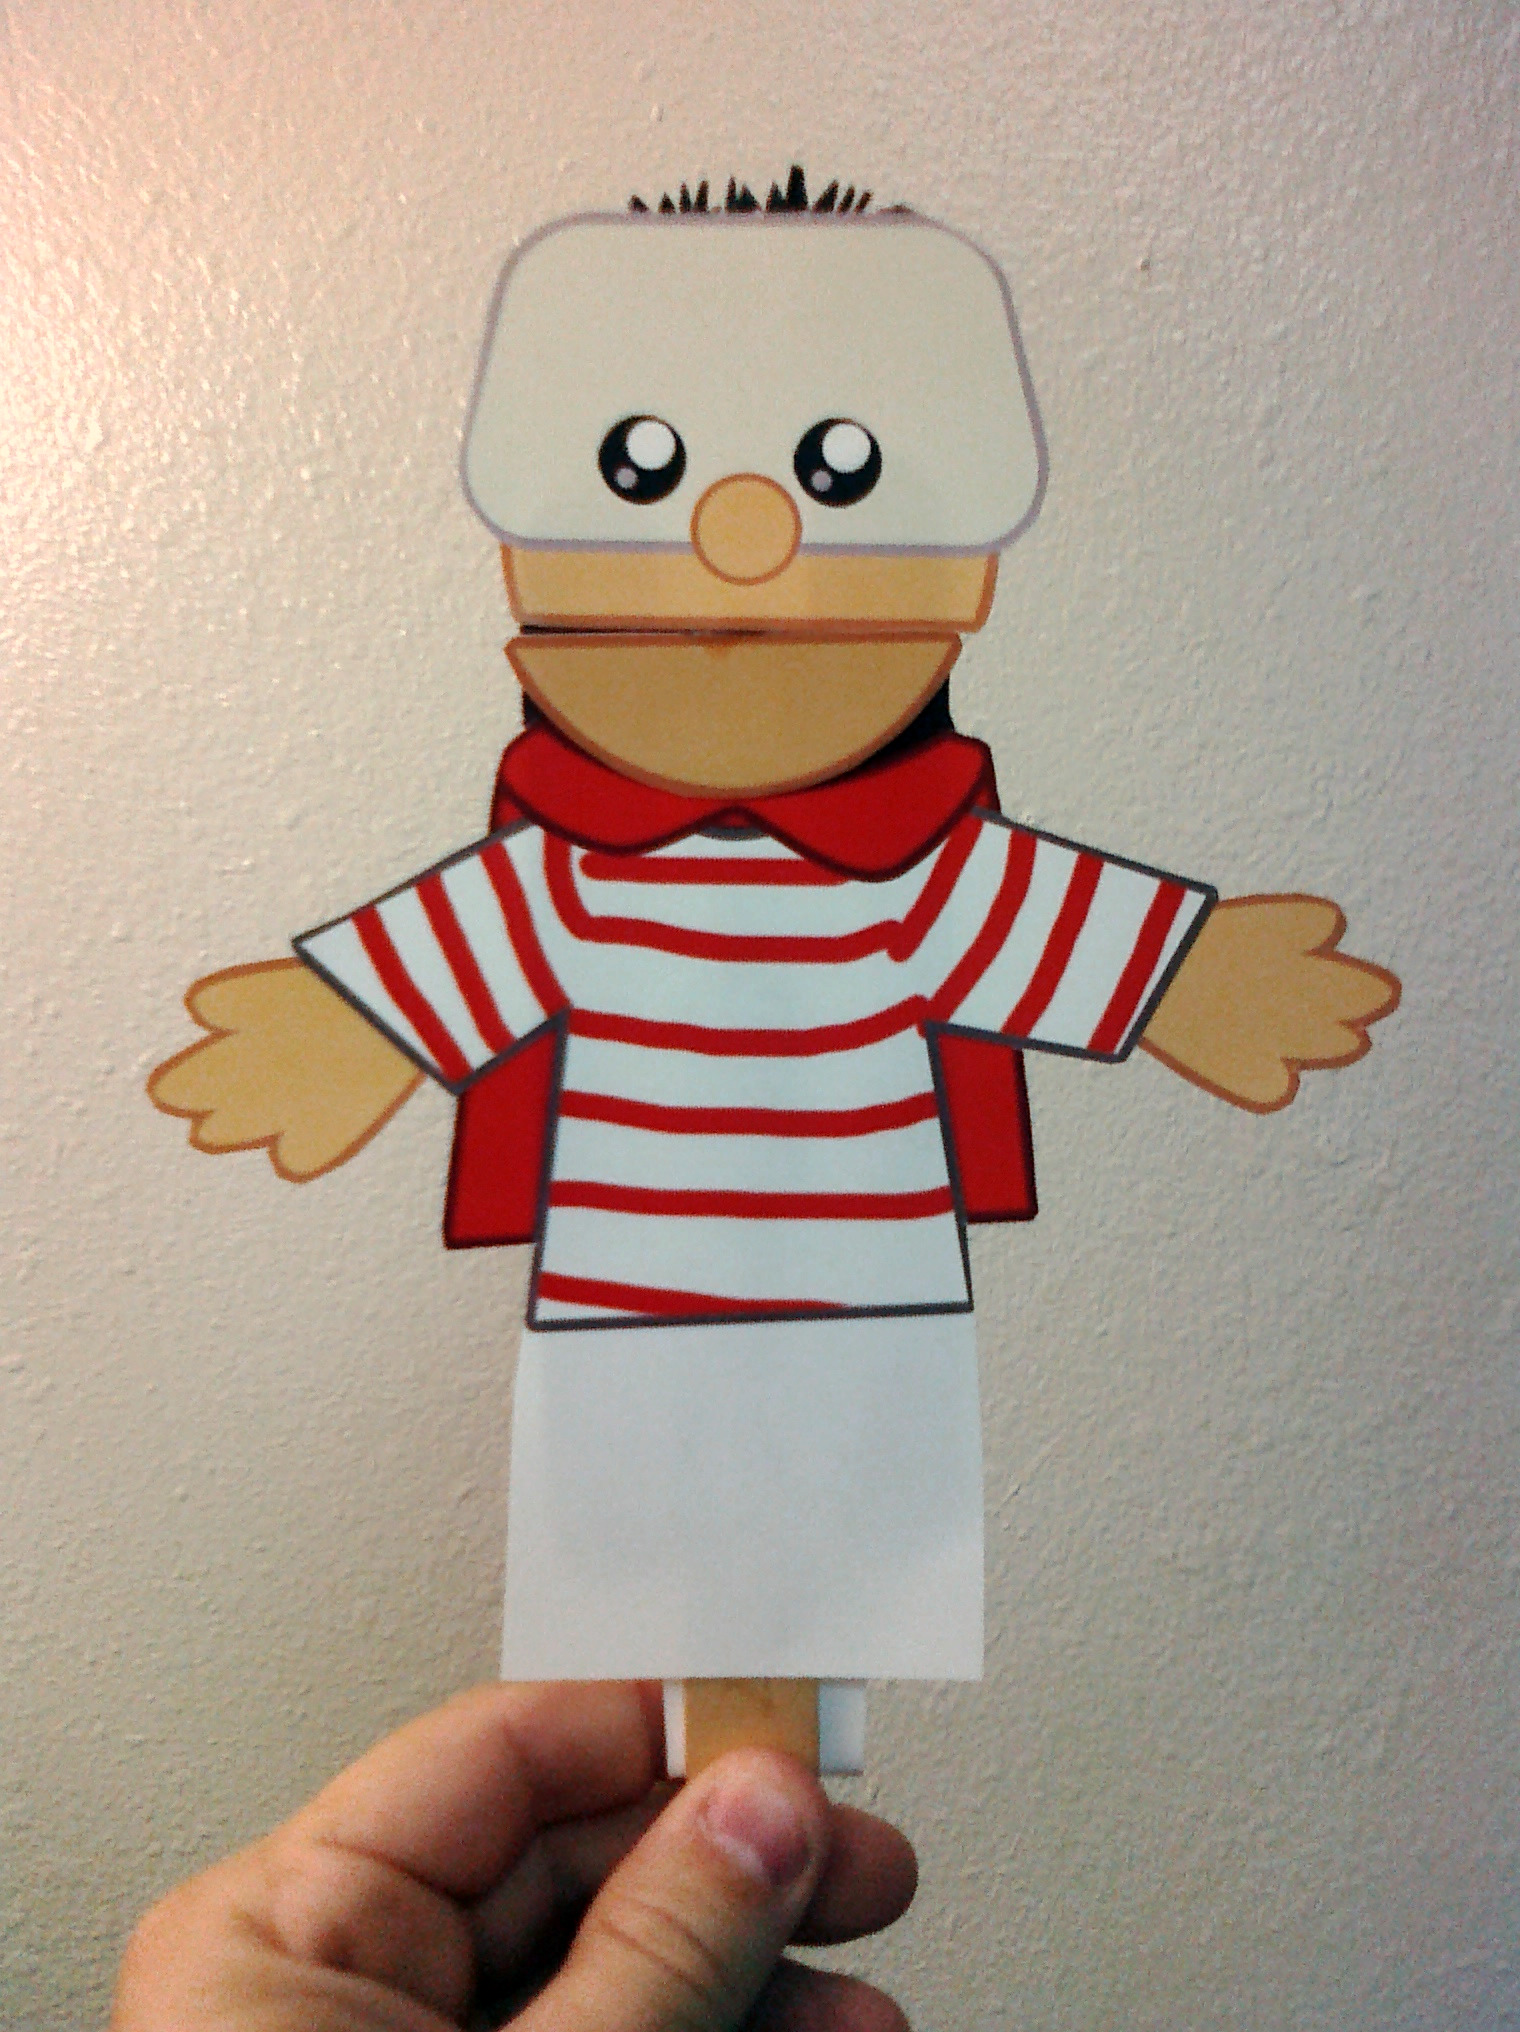
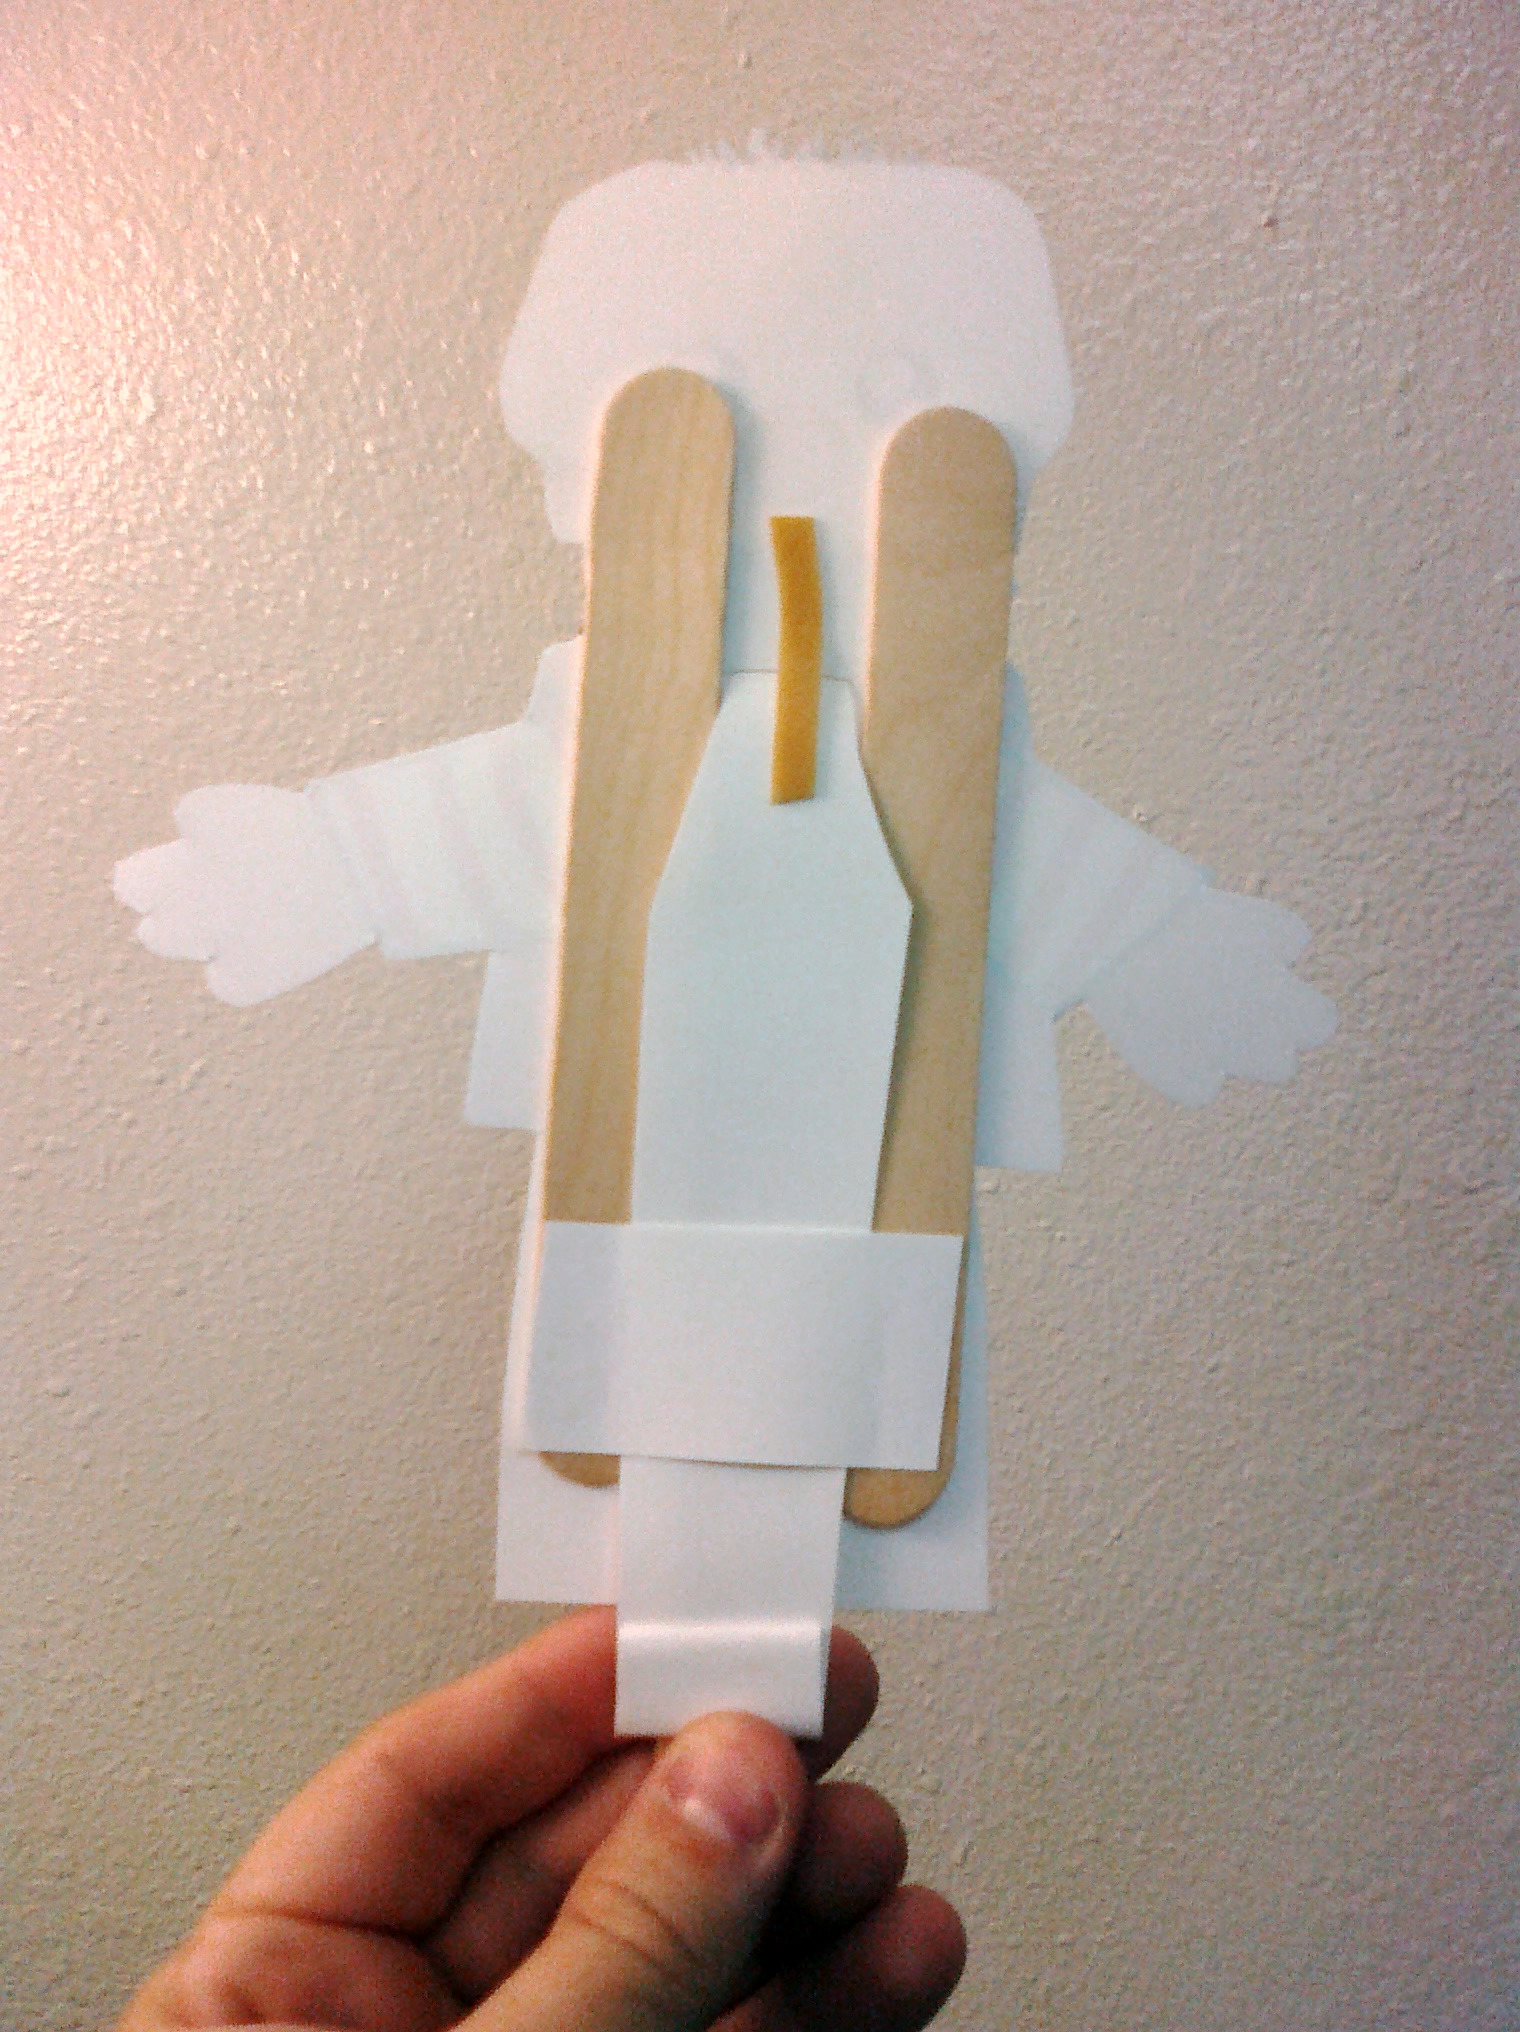
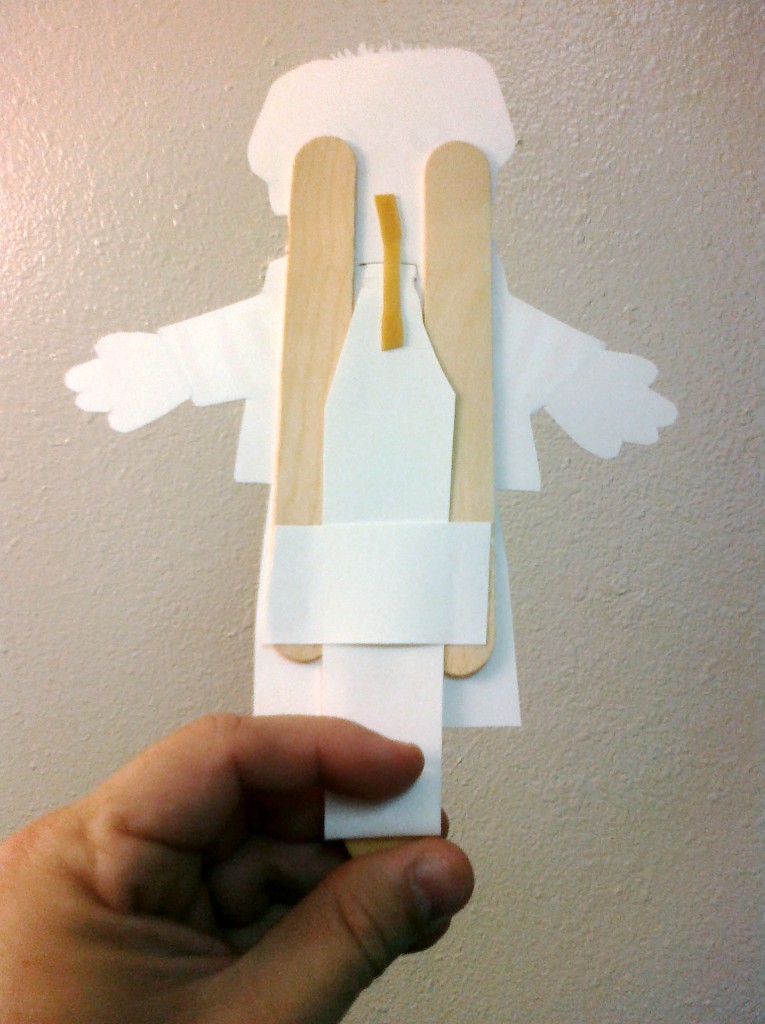
I added some tongue depressors to the back for support with Super Glue. I added a short length of rubber band to the back to pull the mouth back up when I pulled down. Then I wrapped the end of the mouth manipulation strip around a bit of Popsicle stick so I could pull it down with one hand using my thumb. And that was it!

Check out the video of the finished puppet so you can see what I’m talking about here.

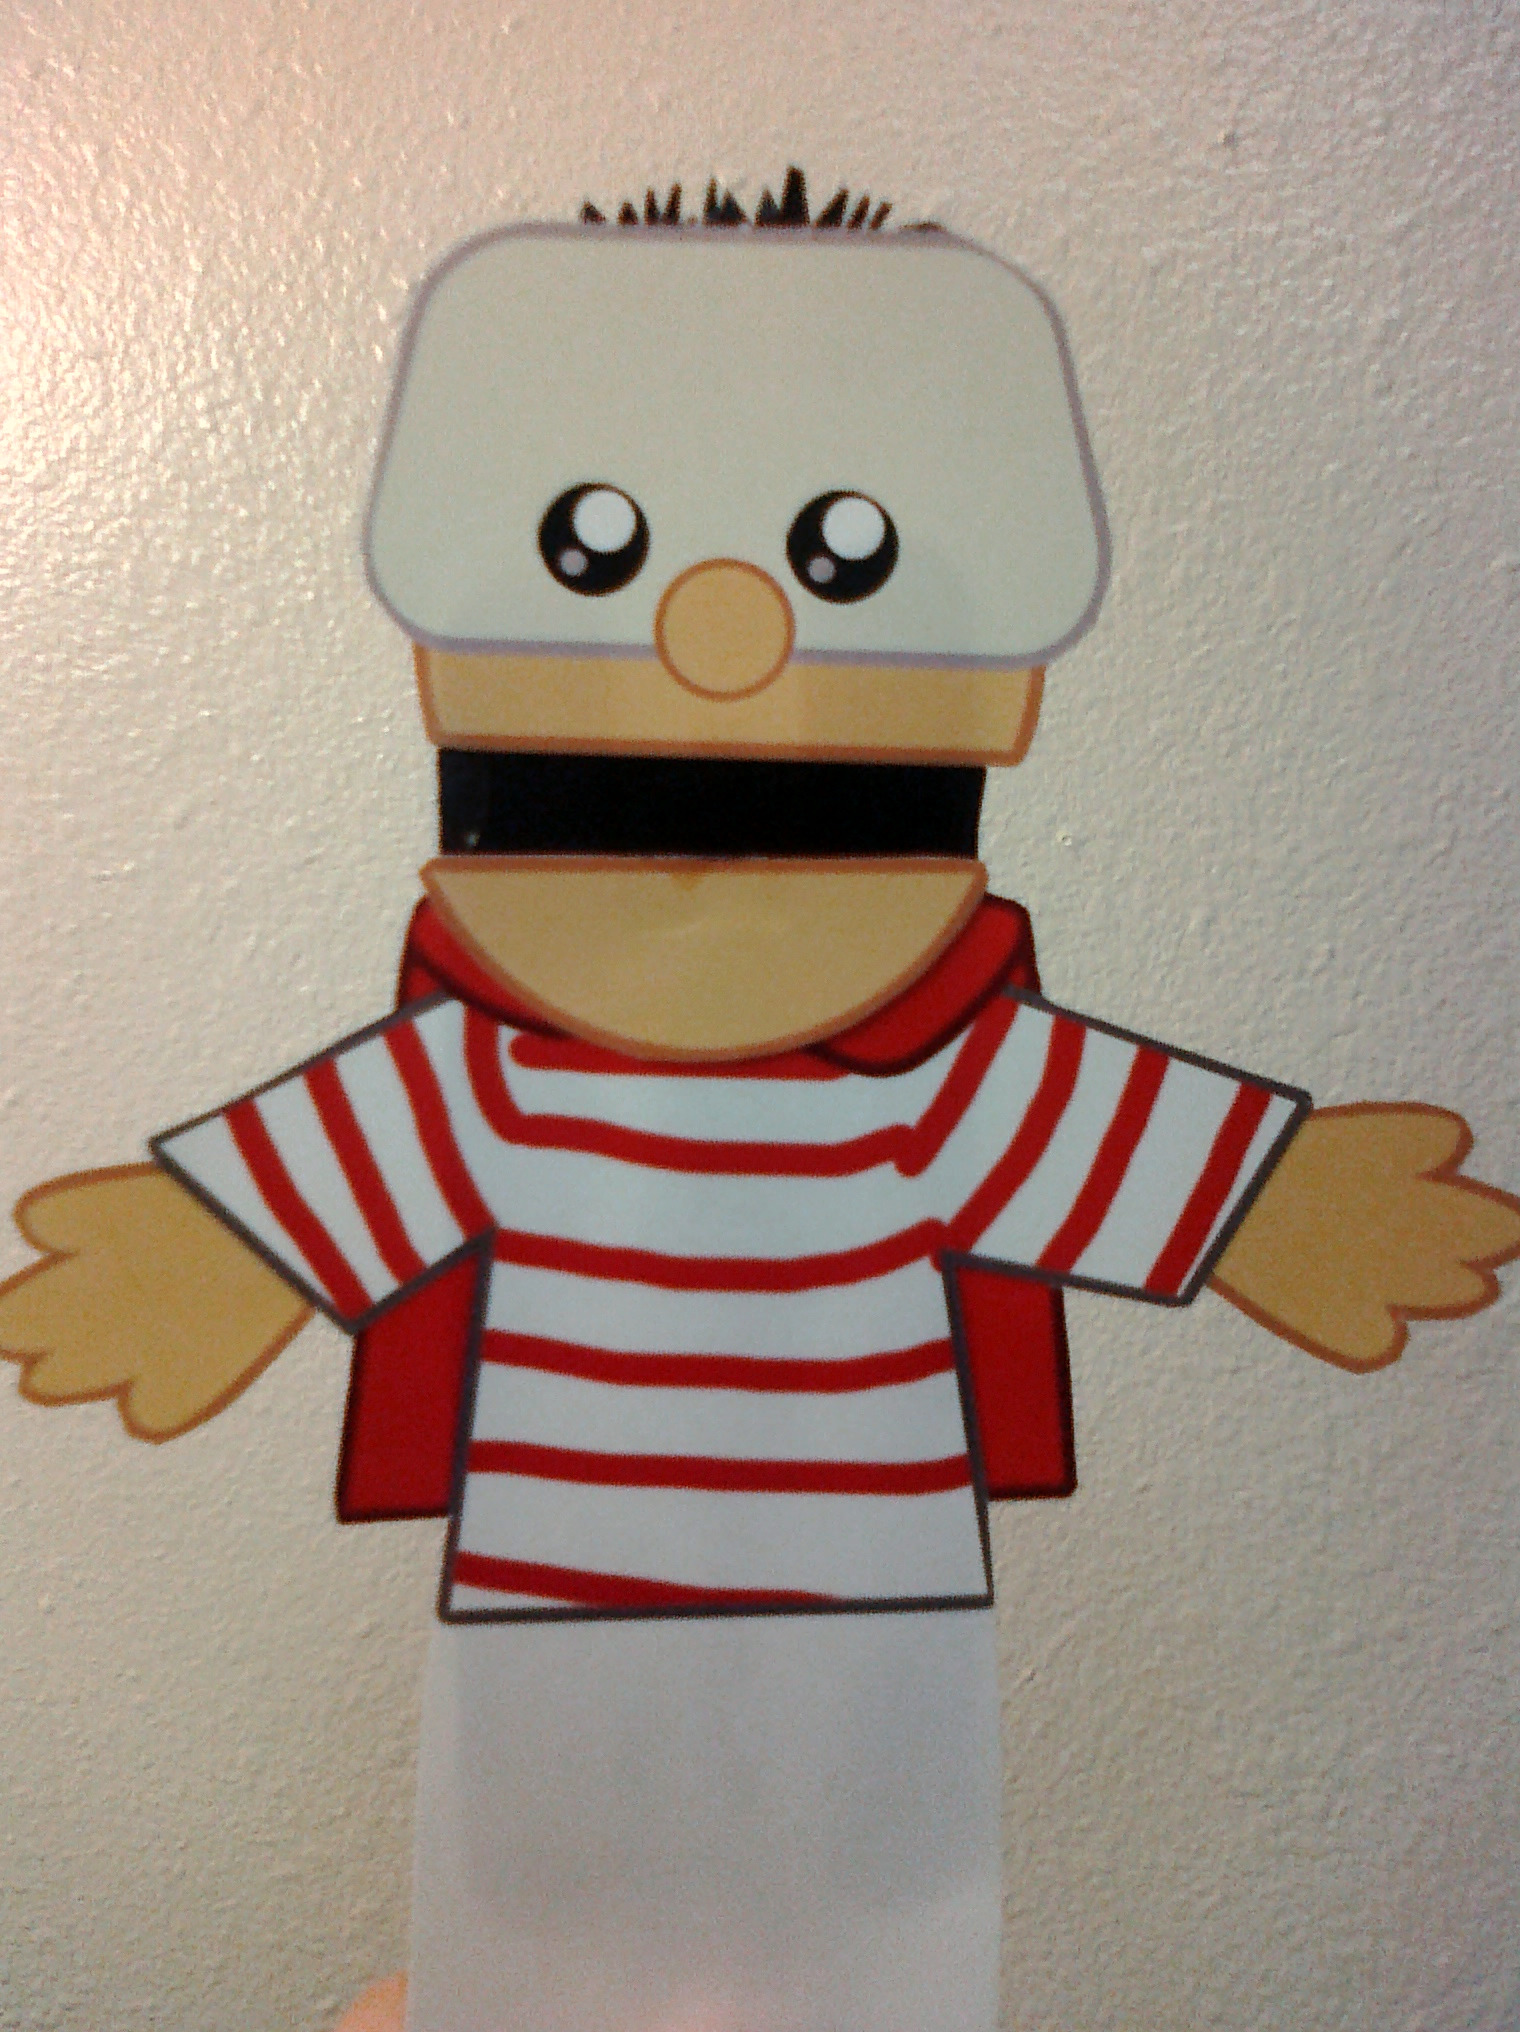
I’m very pleased with the result. I’ll defiantly be making more of these… and I’m pretty sure Little Scripture Man will become a regular on Sundays.

What do you think? Will you try your hand at making a paper puppet? Shoot me you thoughts in the comments.

How To Make Street Signs, Sign Posts With PVC, Cheap


I divide my kids up by grade. Kindergarten, and 1st through 5th… each have their own section to sit in. I then divide those six groups into two teams (almost like the traditional boys vs girls): 1st, 3rd & 4th vs K, 2nd and 5th. This keeps things pretty balanced and allows me to sit kids of the same age together which builds friendships and helps new kids find friends quickly.

It may sound confusing, but with my Street Signs, it’s super simple for the kids to keep track of where they sit. I’m presenting my rough plans and some photos of the completed project. It’s not a step-by-step by any means… but it should give you enough information to make your own. You could use this idea for pretty much any sign holder you might need. Sure beats paying hundreds of dollars for commercial bases and sign holders.

Here’s the completed sign and stand. The PVC was all 1 1/2″ Solid Core PVC Pipe. The signs are Aluminum and I ordered them from a local vinyl cutting sign shop.

Product List (per sign):
1 – 4’ PVC
3 – 12” PVC
2 – 4.5” PVC
5 – 90° Elbows
1 – Threaded Cap
1 Threaded Plug
1 – T Joint
1 – Cotter Pin
PVC Primer
PVC Glue
Silver Hammered Finish Spray Paint

After collecting all of the pieces and cutting them to size, I glued them up according to the plan sketch above. I used a hand-held miter saw to cut a slot about half-way down the top of each Threaded Plug to hold the signs. Then I spray painted the assembled stands. After they dried I slid the sign into the slot and drilled a small hold through the plug and sign. I used a cotter pin to keep the sign fixed to the plug.

The base of each unit can be removed from the main shaft. The signs can be removed by unscrewing the plug from the threaded cap or by removing the cotter pin. Keeping some of the parts loose allows me to store them easily… or replace broken pieces without having to start completely over. The poles take the most wear and tear because kids like to lean on them… the poles can flex without breaking off from the base… but can easily be tightened with just a little downward force.

We’ve been using them for about two months now and they still look as good as the first day. The hammered finish spray paint is very tough, sticks well and resists chipping well. They’re very light-weight so they’re easy to carry and won’t hurt a child if they tip over…. not that they ever have. The wide base keeps them upright and secure. This was a successful project and with a relatively low price.

I spent about $90 on PVC and $90 on the vinyl signs, so around $180 total for six signs. Compare that to the quote from the sign shop for their stands and signs at $399 each!

What do you think? I’d love to get your feedback in the comments. If you have any questions, post them and I’ll respond!