How To Start A Podcast

This article contains affiliate links. If you buy something, I get a little money. You know how it works.

I get this question a lot so I thought I’d write up a post that would explain how to start a podcast. I’m going to assume that most folks want to do their podcast for as little money as possible. I will begin with low-cost/free options and then go up from there. If you’d like to know my own setup and how I podcast click here: How I Podcast 2019

What is a podcast?

A podcast is an audio file (mp3 typically) that folks can access through an RSS feed. To have your own podcast you’ll need:

  • Microphones & Headphones
  • Computer or recording device
  • Audio editing software (to edit, compress and tag your podcast audio file)
  • Media hosting (a place to keep your mp3 files online)
  • A website (to host your RSS feed).

Podcasting for (close to) free.

If you’re looking to podcast for with nearly no budget, this is possible. There are compromises you’ll have to make and you may not have as much control as you’d like over your media, but free is free.

  • Microphones & Headphones
    • Use headset microphones (under $30 on Amazon). You’ll be combining two of your needs into one.
    • Or use a single mic, like the Snowball, and use wired Studio Headphones.
  • Computer or Recording Device
    • Use your computer or laptop to record audio using either USB or the Mic In and Headphone jacks.
  • Audio editing software
    • You can use Audacity to record, edit and compress (from wav to mp3) your audio file.
    • You can use MP3tag to edit the tags for your mp3 file. You’ll be editing the Title, Artist, Album, Year, Track, Genre, Description (Comment) and Show Art. (Click here for more information on using MP3tag.)
  • Media Hosting & Website
    • Use a free service like Talkshoe to host your files and generate your RSS feed.

Podcasting with a budget

If you’ve got some money you can do a little better. See my article on Equipment Suggestions for a Basic Podcasting Kit

The Recording Process

  1. Record your audio. Save the completed file to your computer.
  2. Edit the audio file using the editor of your choice. This can include removing dead space before and after the episode, removing “um’s” and “ah’s” or adding sound effects.
  3. Save your file as an mp3.
  4. Use MP3tag to set your mp3 tags.
  5. Upload your file to your hosting service.
  6. Add your episode to your RSS feed.

How to get your podcast on iTunes

  1. Log in to iTunes Connect.
  2. Submit your RSS feed.
  3. Copy your iTunes URL for future use.

If you have further questions ask away. Also check out the other posts I’ve done on podcasting.

Two Great Clean Comedy Podcasts

We’ve all been there, in the car, driving for miles, and the kid’s music is driving you nuts. It’s time for something that’s good for the whole family. Here are a couple of clean comedy podcasts that will entertain everyone.

Red School Bus

Red School Bus is a clean comedy podcast for the whole family. Hosts James and J (a father/son duo) share real life stories from their own lives as well as those submitted by the kids who listen every week. It’s clean and safe for all ages.

You can find it in Apple Podcasts, Google Podcasts with more subscriptions options at http://rsbcast.com

That Story Show

That Story Show is a clean comedy podcast rated E for everyone 10 and up. Hosts James and John share hilarious stories sent in by fans of the show. That Story Show (formerly Nobody’s Listening) has been around since 2006 and has over 335 episodes. Many new listeners will just start and the beginning and listen all the way through.

You can find That Story Show on Apple Podcasts, Google Podcasts with more subscription options at http://thatstoryshow.com
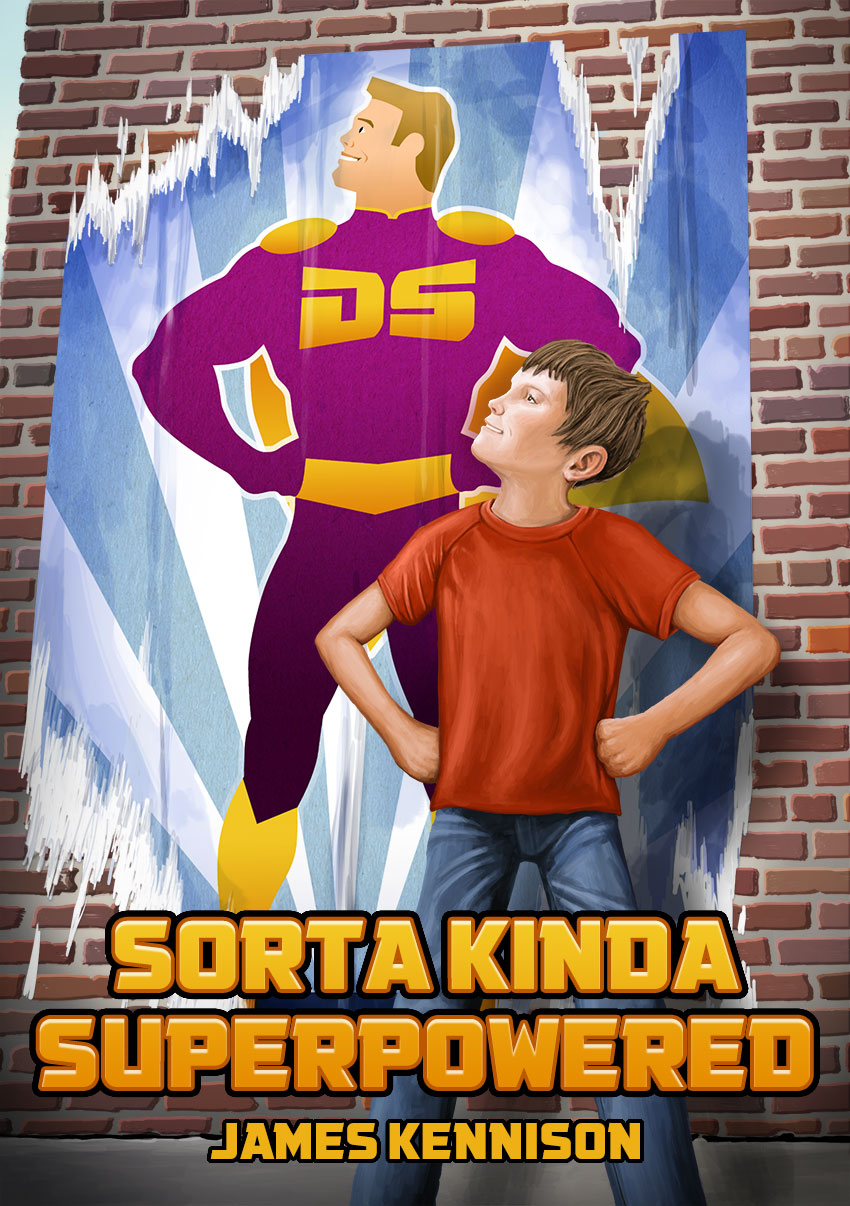
How I Podcast 2022

**Updated 4/2022**

Product links are affiliate links. These are products I use and stand behind but I get a commission when you use my link to purchase them.

Here’s a diagram of my current podcast setup. I’ll attempt to explain what equipment I’m using and how it’s connected. Click to make the image larger.
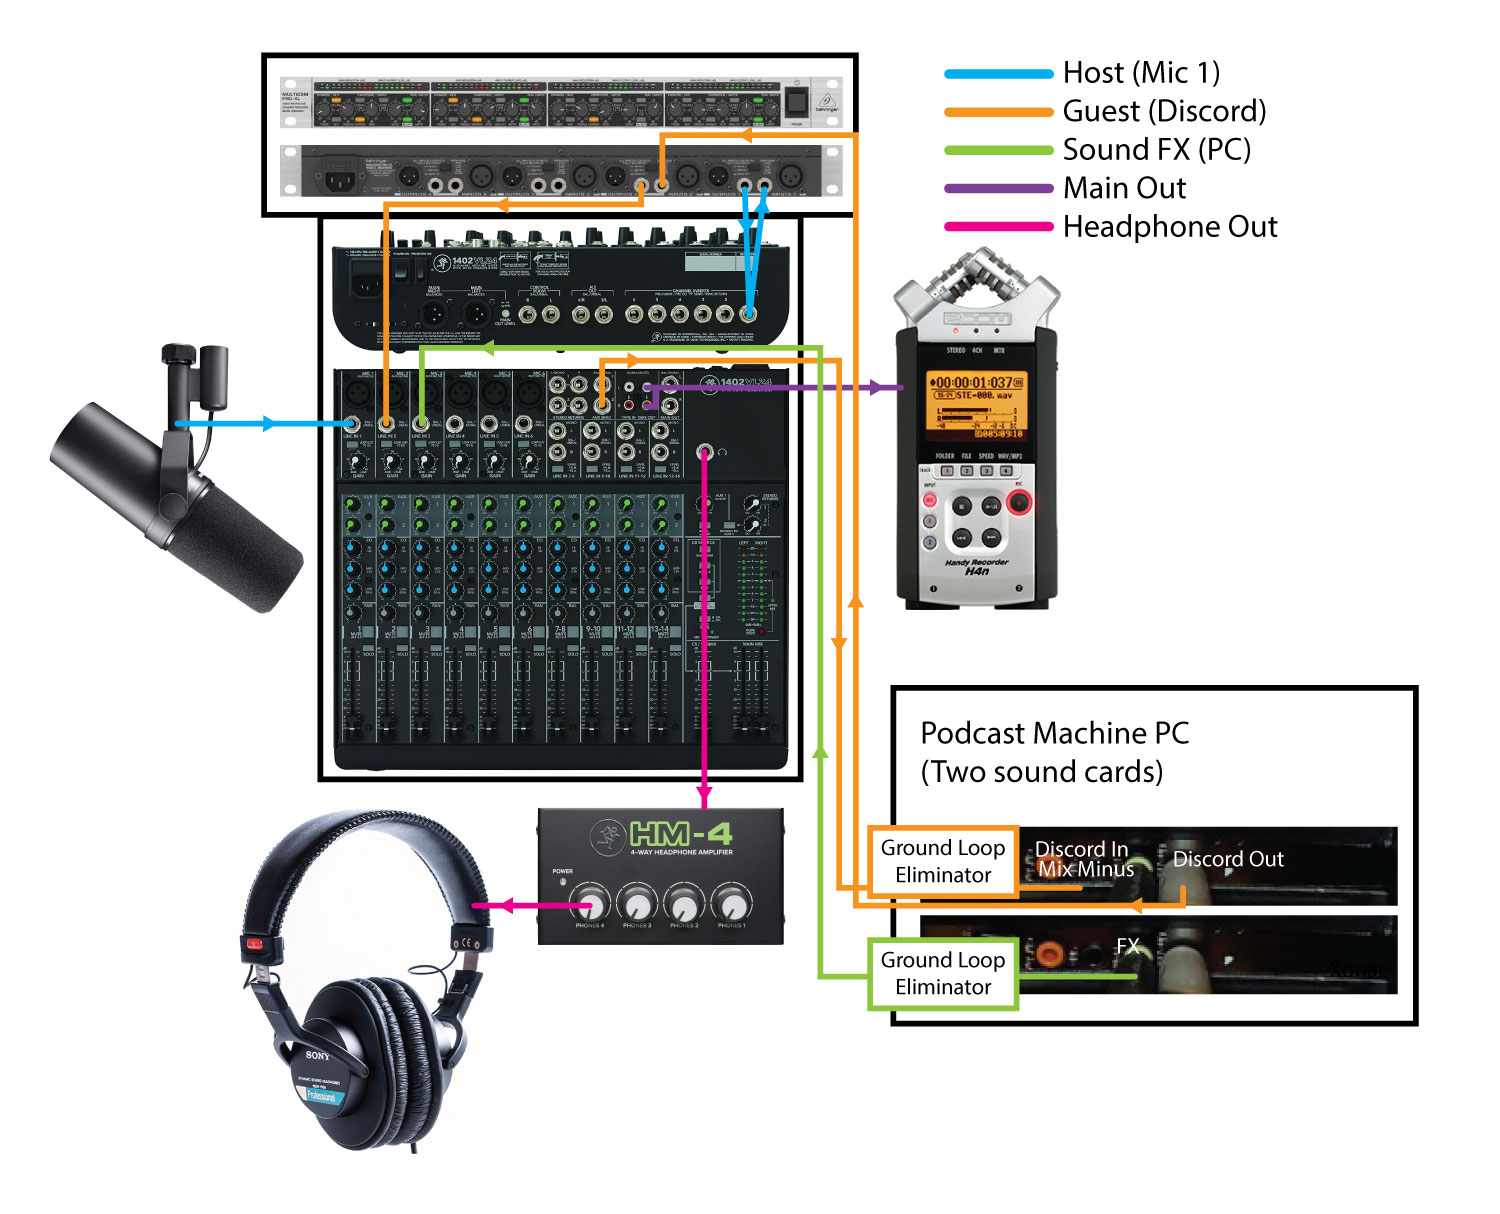
Equipment:

Software:

  • Adobe Audition CS6 – Editing and encoding
  • Mp3tag – ID3 automated tag editing
  • Photoshop CS6 – Editing episode images
  • Absolute RSS Editor – Feed Generator
  • Podcast Soundboard – For playing music, intros, voicemails live
  • Discord – Free voice and text chat

Online Services:

Recording Setup:

  • Main Mix:
    • Mic 1 plugs into the first channel on the mixer.
    • TRS (Tip Ring Sleeve) cable from the back of the mixer into the Compressor/Limiter/Gate and then back from the Compressor to the channel.
    • Audio goes through Tape Out (L/R) using a stereo RCA to 1/8″ cable and into the H4n recorder.
  • Aux Send (Provides a Mix-Minus for my cohost via Discord):
    • Mic 1 plugs into the first channel on the mixer.
    • Aux Send is output from mixer via stereo 1/4″ TRS to 1/8″ stereo plug and a Ground Loop Eliminator to Line In on the Podcast Machine.
    • Discord is set to receive sound from Line In so co-hosts can hear everything but themselves (called a Mix-Minus).
    • Line Out on the Podcast Machine sends incoming audio from Discord into Compressor/Limiter/Gate and then into Channel 3 on the Mixer.
  • Input from Discord:
    • Output from the soundcard runs through a mono1/8″ to 1/4″ cable into the second channel on the Compressor/Limiter/Gate and then into the 4th channel on the mixer via a 1/4″ patch cable.
  • Soundboard:
    • Soundboard software plays sounds when triggered sending audio out of 2nd sound card in Podcast Machine and into Channels 7/8 on the Mixer.
  • OBS:
    • I’m not currently live streaming video and audio to Twitch, but when I did I ran the Main Mix through a Ground Loop Eliminator and into the Line In on the 2nd sound card on the Podcast Machine.

Recording Procedure:

  • I turn on the Power Conditioner which powers up my Mixer, Compressor/Limiter/Gate, and H4n Recorder.
  • I insert the SD card and once the H4n boots I hit record on the remote twice to begin recording.
  • Throughout the show, I can press the Record button again to place a marker in the waveform that I can see later in editing. Helps me find things later that I want to modify.
  • During recording, I mix everything live. All music, fx, bumpers, voicemails, and mics are recorded to the H4n.
  • After recording, I turn off the H4n and eject the SD Card, place it into a dongle on my Main PC and import the waveform.
    • I import each episode to its own directory (example: podcasts/tss/283/wavform.wav)
  • I open the Wav file in Audition. I trim the front and end of the episode, plus make any edits I may have tagged during the recording of the show.
  • I run a Multiband Compressor and Hard Limiter on the waveform to get the most volume possible and then save it as a 16-bit mp3 file (thus keeping the original wav unedited and archived).
  • I open the mp3 file into MP3tag, and I give the mp3 a title (234: The Tree Dude). then using an Action I created (see how here) I automatically add artwork, episode numbers, and other information with one click. My mp3 filename is also automatically generated (ex: 234-the-tree-dude.mp3)
  • I then upload the tagged mp3 file to SoundCloud, enabling the permission to download the file.
  • Using the RSS Feed SoundCloud automatically generates, I locate the address of my uploaded file and copy it.
  • I log in to WordPress and create a new post and using the PowerPress plugin I paste the address of the mp3 into the appropriate box. I add a featured image, show title, and description and hit Publish.
  • For That Story Show, I do not use PowerPress. Since the feed contains over 400 episodes I use Absolute RSS Editor to create a very bare-bones feed that will allow all of my podcasts to be listed at once.

Conclusion

If you have any questions about my setup, equipment, or software and you are a hobby podcaster, feel free to touch base. If you are podcasting for your business or to get rich I would urge you to find and pay a podcasting guru.

For more (possibly outdated) information on podcasting check out other podcasting articles I’ve written: